The preferences for stitch file conversion to the DST format are accessible under the Edit -> Preferences menu in the Conversion when your format is set to DST.
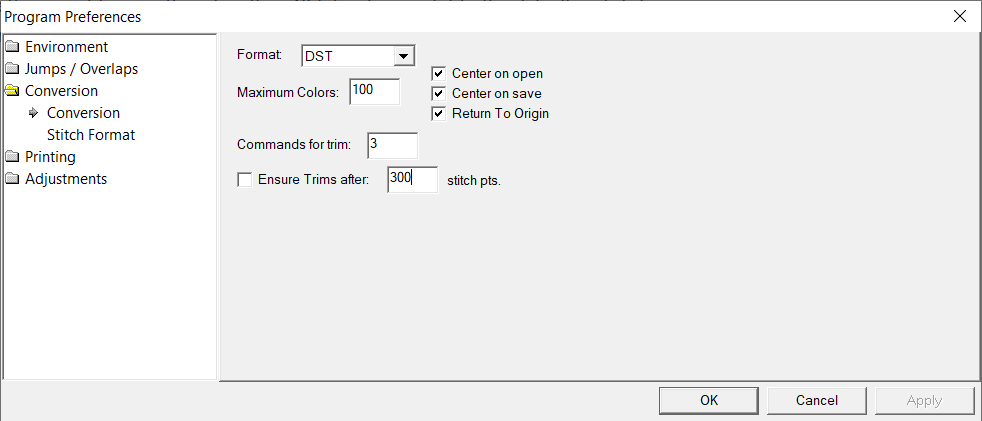
'Center on' and Return to Origin
Centering the start and end point of a design is not automated on many commercial embroidery machines. Moreover, some embroidery processes require set origin and exit points. Therefore, the DST file conversion preferences allow for automatic centering options and returning to origin for both the import and export of DST files.
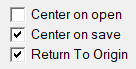
Center on Open
Checking the Center on open box affects the way that DST files are imported. If this is checked, a DST file that does not have its start and end points centered to the area of the design will be centered in the hoop when opened. When saved as a new stitch file, it will retain this centered starting position.
Center on Save
Checking the Center on Save button affects the way DST files are positioned when saved. If a design is not centered in the hoop on the design page or a design is created that is not in the center of the design page, checking this box will set a non-stitch start and end point at the center of the design when saving, centering the entire design in the output file.
Return to Origin
Checking the Return to Origin box also affects files on saving. If neither of the 'Center on' boxes are checked, the origin or first point in the design will be at the first stitch. Checking this box places a non-stitch movement that returns the needle to that origin position at the end of the design. For designs that are necessarily off-center or need to start at a specific set placement, this makes alignment simple and resets the machine to the original hoop position for subsequent runs.
Maximum Colors
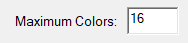
The Maximum Colors setting can be used to limit the number of color stops in a given DST file. When the number of color changes in a DST file is more than the number in this setting, multiple files will be saved, each with the maximum number of color stops shown here. For example, if your design has 9 colors, and you have set Maximum Colors to 6, two files will be saved. The first, filename.dst will contain the first 6 color changes in the design sequence, and filename(2).dst containing the remaining 3. This may be helpful for those who wish to run designs with more colors than they have needles on their machine, as they can run the first design and then,on its completion, load the second design and rethread it for the subsequent color changes.
Trims
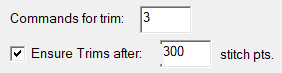
Commands for Trim
The Commands for trim setting specifies the number of non-movement 'jump' stitches in a row your machine requires to fire it's trimmers. This setting should match the setting in your particular machine's parameters.
Trims and the DST Format
The DST file format doesn't contain a specific 'Trim' command. Trimming is interpreted by embroidery machines looking for a number of back-to-back 'Jump' stitches in a design without needle drops between them. This interpretation happens on the embroidery machine, thus machines will usually have a setting for how many of these no-stitch 'Jump' commands in a row it should look for and interpret as a 'trim' so that it will fire it's trimmers. The default setting for most machines is 3, but it may be 5 and can usually be changed in the machine's settings.
Ensure Trims After
This setting is used to automatically convert overly long stitches that should have been coded to trim into trims as a design is saved. Checking the Ensure Trims After box adds the number of jump stitch codes (set in the above Commands for trim) to any stitch over the maximum length in stitch points as set in the text box on save. Note, 1 stitch point is equal to 1/10th or .1 millimeters.
For example, if the Ensure Trims After box is checked, and the maximum length in the text box is set to 100 stitch points (10mm or 1cm), any stitch in your design over 100 points will have the jumps added to it to convert that stitch to a trim. If you regularly create, modify, or add to large designs or those with wide satins or other long unbroken stitches, you may wish either to disable this setting or have a relatively large length by default. Many start with the 12.7mm or 127 point maximum that most machines stitch normally and increase that limit if they find their designs regularly have stitches longer than 127 points.
PLEASE NOTE: If you are saving a design with long, unbroken stitches as a DST file and still want to employ this filter, please make sure to set the length at which Ensure Trims After will trigger at a length longer than any stitch in the design that should appear as part of the embroidered result. Wide satin stitches commonly seen in designs like large text and monograms may have stitches longer than the usual recommended maximum and thus may be converted to non-stitching trims if your Ensure Trims After setting is too short for the design. In the case you find your DST file 'missing stitches' on output, either uncheck Ensure Trims After completely or set your length to a setting longer than your longest design stitch and resave the output DST file.